I recently turned on and homed my 3d printer, only to find it grinding against the side shortly afterwards. Here is what I found. I did a quick check of my limit switches (seems to be a common cause) and found out that they are good. It turned out not to be necessary for me, but I could also have checked the voltage to the motors.

What it turned out to be was that the cable that provides power to the hotend fell down in front of the limit switch. Then when I homed it, the axis wasn’t able to reach the limit switch. The fix involved a quick zip tie of the cable harness to make sure it didn’t happen again.

Each 3d printer owner buys their printer for their own reason. Some of the most common reasons are that they enjoy making models or that they like to tinker and invent. I do both. I picked up a ceiling fan for $10. It was listed so cheap because it was missing a piece. A small plastic piece. Ha! I thought, this is perfect. I’m teaching my two boys about design, drafting (on paper) and cad drafting. This was a perfect real-world opportunity to have them put their skills to use. We looked up the OEM piece online, took some measurements on our parts to get the sizes right, sketched out some ideas on paper, then created some cad files. Bing bang boom! For about $0.05 we now have a working fan, but the lessons that they learned are worth so much.

After a while, things wear out on your printer. One item that is often overlooked is the connection on either end of a Bowden tube. If the teeth that hold the tube in place aren’t doing their job correctly, the tube can move back and forth as the extruder extrudes and retracts filament. The result of this is that you can end up with zits and voids in your final print.

To fix this, replace the fittings on either end first. If it still happens, replace the tube too.

Just like checking your oil and your tire pressure on your car every once in a while, you should run a quick check on the overall health of your printer from time to time, as well.

My preferred way to do this is to print a Benchy model. There are other torture tests, but once you know what you are looking for with this model, it can tell you a whole lot. It is not a diagnostic tool, in the sense that it will tell you what adjustments to make, but it does tell you if there is a problem so that you can do some additional investigation, if needed. Benchy features include, bridging, holes of all types and angles, retraction, fine details, etc.

There are a lot of potential causes for stringing, or spider webs. Some of the most common are poor retraction settings, poor temperature settings, and an improperly calibrated extruder.

Also, keep in mind that ambient temperature can affect stringing if you don’t have an enclosure.

The first thing that I do if I find that my printer is stringing is print a retraction tower, a temperature tower, and recalibrate my extruder. This takes 30 minutes and saves tons of time.

Why get a 3d printer? What value do they bring? Personally, I think they solve many problems that the manufacturing industry has struggled with. Prototyping, for example, comes to mind. It might take the tool shop a week to build a prototype part just to see if something will fit in an assembly. If you just need to check the overall envelope, you can often do it much quicker on a 3d printer and iterate through the design process.

Personally, I use mine all the time to solve problems at home. My wife can’t find curtain tie backs that she likes? Fine, she can just sit with me while I design something and then I’ll print it for her.

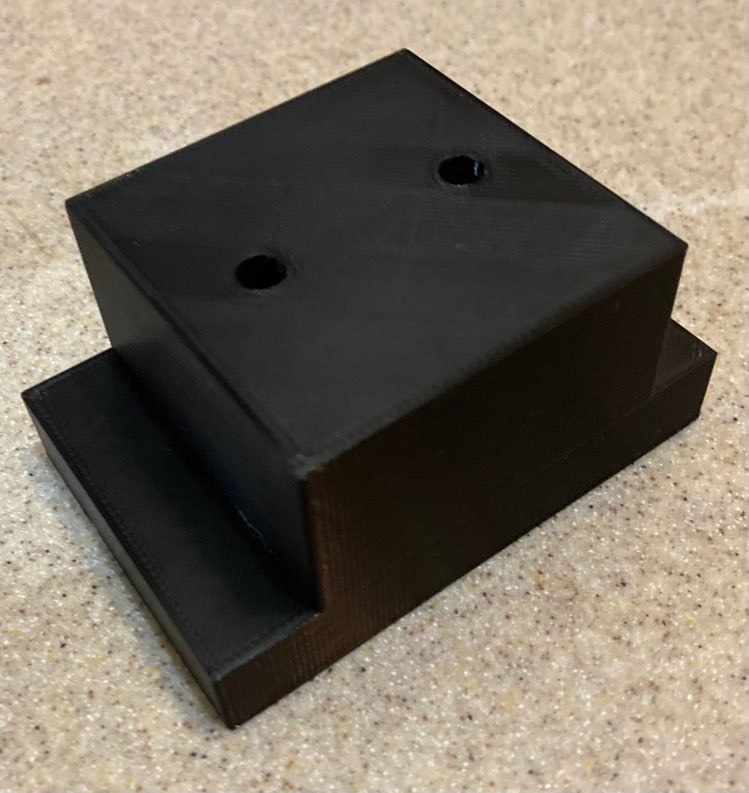
We inherited a TV over the weekend. My father-in-law had it mounted on a wall in his workshop and he had thrown away the feet for it several years ago. He gave it to us and I thought it would be a good learning opportunity for my kids to learn how to solve problems. I had them design some feet for it. Their first step was to create a drawing on paper. I’m old fashioned. I still believe that if you can’t put it on paper then you probably have no business trying to put it on cad. Once I approved of their design they had to sit down and draft their new idea. Then they had to print it. What you see below is how a 10 year old solved the problem of a TV having no feet.

Sometimes, the Bowden tube will pop out of the extruder. It can happen at either end, but I have found that it happens much more frequently at the extruder end.

This can be caused by two things:

  1. Clog in the nozzle. The nozzle gets clogged, then the extruder keeps pushing filament. Eventually, the Bowden tube will pop out to relieve the pressure.
  2. The teeth in the pneumatic coupling have worn out. In my experience, this comes from frequently removing the coupling and pushing it back on. If this is the case, you just need to get a new coupling.

I’ve seen some users having issues when using Cura 5. After doing some experiments myself, talking to some folks, and looking around through the help forums, it seems to me that Cura 4 profiles don’t carry over well into Cura 5. I’ve personally had the best success, and seen others with the same conclusions, when they create brand new profiles in Cura 5. The default action is for Cura 5 to import all of your Cura 4 profiles. It will work, but most users end up with ugly prints. I’ve found that Cura 5 works much better when I create brand new Cura 5 profiles and update them.

I read a user’s help request in an online forum that was interesting because it illustrates what can happen from time to time. The symptom that the user was experiencing was that there was way too much squish in their first layer of printing. It was almost non-existant.

They were stumped for a while as to what the cause was. In reading through their comments and the things that they tried, it turned out that they had a BLTouch. Basically, what had happened was that they had set up a mesh bed level manually, and then they allowed the BLTouch to override that stored level. A misconfigured BLTouch was the culprit, in this case. It was going through the motions, but it was storing an inadequate bed level, which was overriding the valid mesh bed level that they had stored previously.