I’m always fascinated with the medical industry. It amazes me how far we’ve come from leeches and bloodletting to the technology that is available today. Sickness and disease that would have been life ending in the past are able to be overcome and healed. Recently, 3d printing has taken the medical industry to the next level. Take a look.

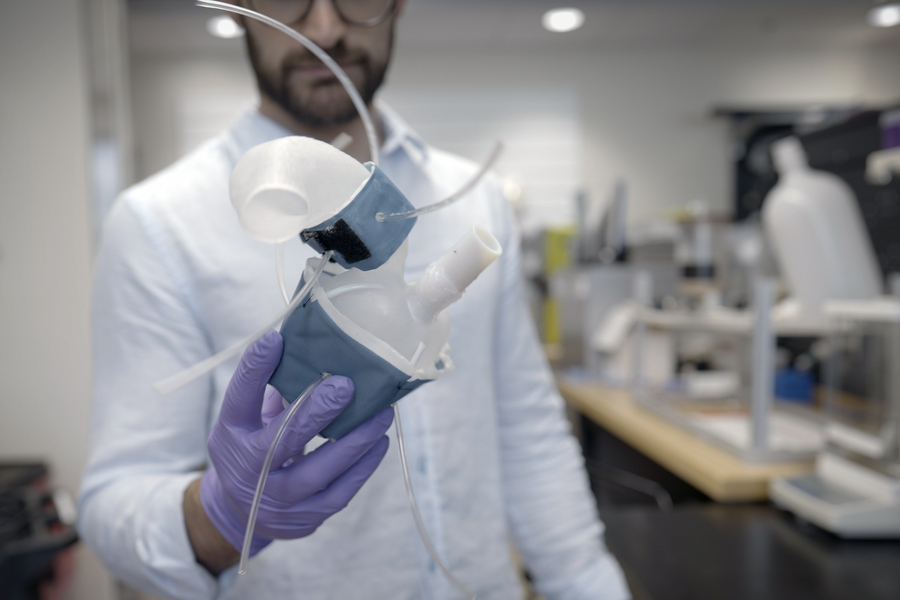
  • Prosthetics and human organs: 3D printing can create customized and functional prosthetics for people who have lost their limbs or other body parts. For example, a company called Open Bionics makes 3D printed bionic arms that are affordable and stylish. 3D printing can also create artificial organs that mimic the structure and function of natural ones. For example, researchers have 3D printed a mini heart with human cells that can beat and contract.
  • Biomedical implants: 3D printing can create implants that are tailored to the patient’s anatomy and needs. For example, 3D printing can create dental crowns, bridges, and implants that fit perfectly and are durable. 3D printing can also create metal implants for bones, joints, and spine that are biocompatible and reduce the risk of infection.
  • Pharmaceuticals: 3D printing can create personalized drugs that have the optimal dosage, shape, and release rate for each patient. For example, a company called FabRx makes 3D printed pills that can contain multiple drugs in one tablet. 3D printing can also create complex drug delivery systems that can target specific tissues or organs.

You might be wondering what kind of surface you should use to print your models. You have a few different options, although some are more common than others.

Glass Bed

A glass bed is a smooth and rigid surface that can provide a flat and even base for your prints. Glass beds are usually made of borosilicate glass, which can withstand high temperatures and thermal shocks.

Advantages:

  • It can produce a glossy finish on the bottom layer of your prints.
  • It is easy to clean and maintain.
  • It is durable and resistant to scratches and warping.

Disadvantages:

  • It can be heavy and fragile, requiring careful handling and installation.
  • It can have poor adhesion with some materials, especially PLA, requiring the use of an additional compound or adhesive layer.
  • It can take longer to heat up and cool down, increasing the printing time and energy consumption.

Some of the common compounds or adhesive layers that can be used with a glass bed are:

  • Blue painter’s tape: Cheap and easy. Provides good adhesion for PLA and other low-temperature materials. Can leave residue on the print surface and need frequent replacement.
  • Glue stick: Simple, effective, and readily available
  • Hairspray: A popular option that can create a sticky coating on the glass bed. However, it can also be messy and affect the air quality in the printing area.
  • Magigoo: A specially formulated glue that can provide strong adhesion when hot and release the print when cold. However, it can be expensive and hard to find.

BuildTak

BuildTak is a thin and flexible plastic sheet that can be attached to the print bed with an adhesive backing. BuildTak is designed to offer a textured and durable surface that can work with a variety of materials.

Advantages:

  • It can provide excellent adhesion for most materials, reducing the risk of warping and curling.
  • It can produce a smooth and matte finish on the bottom layer of your prints.
  • It can last for a long time and withstand multiple prints.

Disadvantages:

  • It can be difficult to remove prints from the surface, requiring the use of a spatula or a scraper.
  • It can be damaged by sharp or abrasive tools, requiring careful handling and removal.
  • It can be expensive and hard to apply without bubbles or wrinkles.

PEI Sheet

PEI (Polyetherimide) is a thermoplastic polymer that can offer a smooth and glossy surface for your prints. PEI sheets are usually attached to the print bed with an adhesive backing or a magnetic base. PEI sheets are known for their high temperature resistance and chemical stability.

Advantages:

  • They can provide strong adhesion for most materials when heated and easy release when cooled.
  • They can produce a shiny and smooth finish on the bottom layer of your prints.
  • They can be reused for many times without losing their effectiveness.

Disadvantages:

  • They can be prone to scratching and denting, requiring gentle handling and cleaning.
  • They can lose their adhesion over time, requiring occasional sanding or reapplication.
  • They can be expensive and hard to cut or trim to fit your print bed size.

The speed of the first layer is important because it determines how well the filament sticks to the bed and how smooth the surface of your print will be. However, setting the speed too high can cause some problems that can affect the quality and durability of your print. Today, I will explain what happens if your speed is set too high for the first layer, and how to fix it.

Some symptoms of a too high speed for the first layer are:

  • Poor adhesion: The filament might not stick well to the bed, resulting in warping, curling, or detachment of the print.
  • Rough surface: The filament might not have enough time to melt and spread evenly on the bed, resulting in a rough and uneven surface.
  • Under-extrusion: The filament might not flow fast enough to keep up with the nozzle movement, resulting in gaps or holes in the print.
  • Overheating: The nozzle might get too hot due to the fast movement, resulting in clogging, stringing, or oozing of the filament.

Some ways to remedy a too high speed for the first layer are:

  • Lower the speed: The most obvious solution is to lower the speed of the first layer, either by adjusting the settings in your slicer software or by using the knob on your printer. A good rule of thumb is to set the speed to 50% or less of your normal printing speed for the first layer.
  • Increase the temperature: Another way to improve the adhesion and flow of the filament is to increase the temperature of the nozzle and/or the bed. This will help the filament melt faster and stick better to the bed. However, be careful not to set the temperature too high, as this can cause other problems such as burning or warping of the filament.
  • Level the bed: A properly leveled bed is essential for a good first layer. If your bed is too high or too low, it can affect how well the filament sticks to it and how smooth the surface will be. You can use a piece of paper or a feeler gauge to check the distance between the nozzle and the bed at different points, and adjust it accordingly.
  • Calibrate the extruder: Another factor that can affect the speed of the first layer is how much filament is extruded by your printer. If your extruder is under-extruding or over-extruding, it can cause gaps or blobs in your print. You can calibrate your extruder by measuring how much filament is fed by your printer when you command it to extrude a certain length, and adjusting the steps per millimeter (E-steps) value in your firmware or slicer software.

Every once in a while, I come across a really cool application for 3d printing. In 2015, the ancient city of Palmyra in Syria suffered significant damage at the hands of ISIS terrorists, including the destruction of the iconic Arch of Triumph. Subsequently, the Institute for Digital Archaeology (IDA), in collaboration with UNESCO, used 3D technology to create a scale replica of the arch. They utilized existing 3D models, photographs, and the detailed documentation available from before the destruction. A 20-foot-tall replica of the arch was 3D printed in sections using a stone-like material, and these sections were assembled to create a near-identical replica. This replica was then displayed in various locations around the world, including London and New York City, as a symbol of defiance and resilience, and to promote the importance of preserving cultural heritage.

If you love fishing, DIY, and 3d printing, why not combine all three and make some fishing lures? Here’s how:

  1. Find or design a 3D model of a fishing lure. You can use online platforms like Thingiverse or Cults to browse thousands of free models, or you can use software like Tinkercad or Fusion 360 to create your own. Make sure the model is suitable for 3D printing and has a hole for attaching the hook.
  2. Choose a suitable filament for your 3D printer. You want a filament that is strong, durable and water-resistant. PLA is a common choice, but you can also use PETG, ABS or Nylon. You can also experiment with different colors and effects, such as glow-in-the-dark or metallic filaments.
  3. Slice the model using a slicer software like Cura or PrusaSlicer. Adjust the settings according to your printer and filament. You may want to increase the infill percentage and the number of perimeters to make the lure more solid and heavy. You can also add supports if needed, but try to avoid them as much as possible to reduce post-processing.
  4. Print the lure using your 3D printer. Make sure the bed is level and the nozzle is clean. Watch the first few layers to ensure good adhesion and quality. Depending on the size and complexity of the model, the printing time may vary from a few minutes to a few hours.
  5. Remove the lure from the printer and remove any supports or brims. Use a knife, pliers or sandpaper to clean up any rough edges or defects. You can also use paint, markers or stickers to add more details and colors to your lure.
  6. Attach a hook to your lure using a split ring or a swivel. You can use any type of hook that matches the size and shape of your lure, such as treble hooks, single hooks or jig hooks. You can also add other accessories like beads, feathers or eyes to make your lure more attractive.
  7. Test your lure in the water and enjoy fishing! You can try different lures for different fish species, water conditions and seasons. You can also tweak your designs and settings to improve your results.

Lithopanes are 3D printed objects that reveal an image when backlit. They are a great way to create personalized gifts, decorations, or art pieces. However, 3D printing a lithopane is not as simple as uploading an image and hitting print. There are some considerations to take into account to ensure a successful result.

  • Choosing the right image: Not all images are suitable for lithopanes. Ideally, you want an image that has good contrast, sharp details, and no large dark areas. You also want to avoid images that have too many colors or gradients, as they will not translate well to the grayscale of the lithopane.
  • Preparing the image: Before you can 3D print your image, you need to convert it into a lithopane model. There are several online tools that can help you with this, such as Lithophane Maker or 3DP Rocks. These tools allow you to adjust the size, shape, thickness, and curvature of your lithopane, as well as apply some filters and effects to enhance the image quality.
  • Choosing the right material: The most common material for 3D printing lithopanes is PLA, as it is easy to print, biodegradable, and comes in various colors. However, you can also experiment with other materials, such as PETG, ABS, or even wood filament. The main thing to consider is the translucency of the material, as you want enough light to pass through the lithopane without compromising the image clarity.
  • Choosing the right settings: The settings for 3D printing a lithopane depend on your printer, material, and model. However, some general guidelines are to use a high resolution (0.1 mm layer height or lower), a low infill (10% or less), and a slow speed (30 mm/s or lower). You also want to avoid using supports, rafts, or brims, as they can damage the surface of the lithopane.
  • Print orientation: I have had the best success with lithopanes when I orient them vertically. This does pose a few challenges, specifically the small area that is actually attached to the printer bed, but a brim or a raft can help with this.
  • Finishing the lithopane: Once your lithopane is printed, you can remove it from the bed and trim any excess material. You can also sand or polish the surface to smooth out any imperfections. Finally, you need to find a suitable light source to display your lithopane. You can use a LED lamp, a candle, or even a smartphone flashlight. The important thing is to place the light behind the lithopane and adjust the distance and angle until you get the best effect.

Supports are tricky. You must create a fine balance. Too much support and your supports are difficult to remove and leave ugly marks. Too little support and everything falls apart. Today, I wanted to go over a few things that I consider when setting a print up that needs supports.

First, you need to decide whether you need supports or not. Cura has a handy feature that shows you the areas of your model that need supports in red. To enable this feature, go to the Preview tab and click on the eye icon on the top right corner. Then, select Show Overhangs from the drop-down menu. You will see the overhangs highlighted in red on your model.

If you see a lot of red areas, you might want to enable supports. To do this, go to the Prepare tab and click on the Support icon on the left sidebar. You will see several options for supports, such as Support Placement, Support Overhang Angle, Support Density, and more. Here are some tips for choosing the right settings:

  • Support Placement: This option lets you choose where to place the supports. You can choose Everywhere, which means the supports will touch both the build plate and the model, or Touching Build Plate, which means the supports will only touch the build plate and not the model.
  • Support Overhang Angle: This option lets you choose the minimum angle for an overhang to be supported. The default value is 50 degrees, which means any overhang that is less than 50 degrees from horizontal will be supported. You can increase or decrease this value depending on your model and your printer’s capabilities. A lower value will create more supports, which can improve print quality but also increase print time and material usage. A higher value will create fewer supports, which can save time and material but also risk print failure or poor quality.
  • Support Density: This option lets you choose how dense the supports are. The default value is 15%, which means 15% of the support area will be filled with material. You can increase or decrease this value depending on your model and your preferences. A higher value will create stronger and sturdier supports, which can help with complex or heavy models, but also increase print time and material usage. A lower value will create weaker and sparser supports, which can save time and material but also risk breaking or collapsing during printing or removal.
  • Support Interface: This option lets you choose whether to add an extra layer between the supports and the model. This layer can improve print quality by reducing marks or scars on the model surface caused by the supports. To enable this option, check the Generate Support Interface box. You will see two sub-options: Support Roof and Support Floor. The roof is the layer that touches the model from above, and the floor is the layer that touches the model from below. You can adjust the thickness and density of these layers according to your needs.

I was printing last night and my temperature readout looked erratic like a heartbeat. I stopped the print and started to investigate. When I did, the wire for the thermister came off in my hand, indicating that the loose wire is probably what was causing the issue.

Short post today, but keep up with the maintenance on your 3d printer.

Your thermistor may not be reading correctly.

What is a thermistor and why is it important? A thermistor is a type of resistor that changes its resistance according to the temperature. It is used to measure the temperature of the hotend and the heated bed, which are important for maintaining the optimal printing conditions. If the thermistor is not working properly, it can cause inaccurate temperature readings, which can lead to poor print quality, filament jams, or even damage to the printer.

How can a thermistor degrade over time?

  • Mechanical stress: The thermistor is attached to the hotend or the heated bed with a wire, which can bend or break due to repeated movements or vibrations.
  • Thermal stress: The thermistor is exposed to high temperatures, which can cause it to expand and contract, resulting in cracks or fractures.
  • Environmental stress: The thermistor can be affected by dust, moisture, corrosion, or oxidation, which can alter its resistance or damage its coating.

How can you tell if your thermistor is degrading? There are some signs that can indicate that your thermistor is not functioning well, such as:

  • Inconsistent or fluctuating temperature readings: If your thermistor is losing its accuracy, you may notice that the temperature displayed on your printer’s screen or software is not stable or does not match the actual temperature of the hotend or the heated bed.
  • Erratic or failed prints: If your thermistor is giving wrong temperature readings, you may experience problems with your prints, such as under-extrusion, over-extrusion, stringing, warping, or layer separation.
  • Error messages or warnings: If your thermistor is broken or disconnected, you may see error messages or warnings on your printer’s screen or software, such as “Thermistor open”, “Thermistor short”, “MAXTEMP”, or “MINTEMP”.

How can you prevent or fix a degrading thermistor? There are some steps that you can take to prolong the life of your thermistor and avoid potential issues, such as:

  • Check and clean your thermistor regularly: You should inspect your thermistor for any signs of damage or wear and tear, and clean it with a soft cloth or a cotton swab if it is dirty or dusty.
  • Replace your thermistor if needed: If your thermistor is showing signs of degradation or malfunction, you should replace it with a new one as soon as possible. You can find compatible thermistors online or at your local 3D printing store. Make sure to follow the instructions on how to install and calibrate your new thermistor correctly.
  • Upgrade your thermistor if possible: If you want to improve the performance and reliability of your thermistor, you can consider upgrading it to a more durable and accurate type, such as a PT100 or a thermocouple. These types of thermistors can withstand higher temperatures and are less prone to degradation. However, they may require additional hardware or firmware modifications to work with your printer.