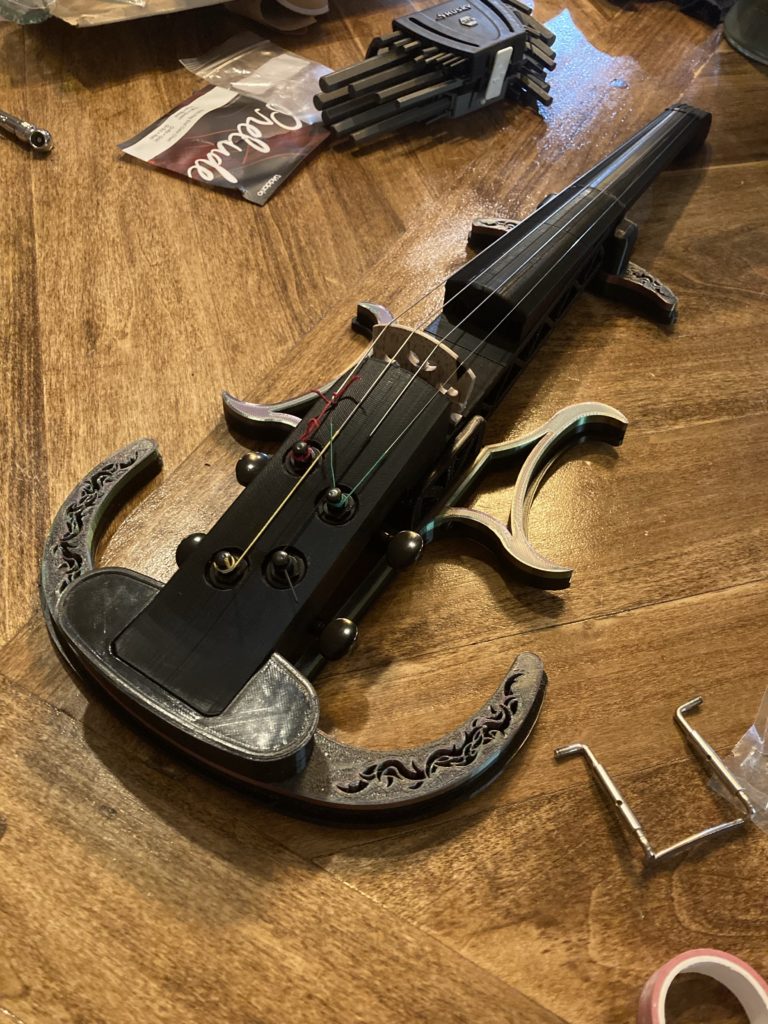
Have you ever encountered the problem of gaps in your printed layers? This can affect the quality and strength of your prints, and make them look less appealing. What causes this issue and how can you fix it?

One possible reason for gaps in 3D printed layers is a low nozzle temperature. If the nozzle is not hot enough, the filament may not melt properly and flow smoothly. This can result in inconsistent extrusion and poor layer adhesion. To solve this problem, you can try increasing the nozzle temperature by 5-10 degrees Celsius and see if it makes a difference. You can also check if your nozzle is clogged or worn out, and clean or replace it if necessary.

Another possible reason for gaps in 3D printed layers is a high printing speed. If you print too fast, the filament may not have enough time to bond with the previous layer and form a solid structure. This can result in weak and brittle prints with visible gaps. To solve this problem, you can try decreasing the printing speed by 10-20 percent and see if it improves the quality of your prints. You can also check if your printer is properly calibrated and has no mechanical issues that could affect its performance.

By adjusting the nozzle temperature and printing speed, you may be able to eliminate the gaps in your 3D printed layers and achieve better results. However, keep in mind that these are not the only factors that can affect your prints. You should also consider the type and quality of your filament, the bed temperature and adhesion, the cooling fan settings, the layer height and width, and other parameters that may vary depending on your printer model and software. Experiment with different settings until you find the optimal combination for your project.

You might be wondering what kind of surface you should use to print your models. You have a few different options, although some are more common than others.

Glass Bed

A glass bed is a smooth and rigid surface that can provide a flat and even base for your prints. Glass beds are usually made of borosilicate glass, which can withstand high temperatures and thermal shocks.

Advantages:

  • It can produce a glossy finish on the bottom layer of your prints.
  • It is easy to clean and maintain.
  • It is durable and resistant to scratches and warping.

Disadvantages:

  • It can be heavy and fragile, requiring careful handling and installation.
  • It can have poor adhesion with some materials, especially PLA, requiring the use of an additional compound or adhesive layer.
  • It can take longer to heat up and cool down, increasing the printing time and energy consumption.

Some of the common compounds or adhesive layers that can be used with a glass bed are:

  • Blue painter’s tape: Cheap and easy. Provides good adhesion for PLA and other low-temperature materials. Can leave residue on the print surface and need frequent replacement.
  • Glue stick: Simple, effective, and readily available
  • Hairspray: A popular option that can create a sticky coating on the glass bed. However, it can also be messy and affect the air quality in the printing area.
  • Magigoo: A specially formulated glue that can provide strong adhesion when hot and release the print when cold. However, it can be expensive and hard to find.

BuildTak

BuildTak is a thin and flexible plastic sheet that can be attached to the print bed with an adhesive backing. BuildTak is designed to offer a textured and durable surface that can work with a variety of materials.

Advantages:

  • It can provide excellent adhesion for most materials, reducing the risk of warping and curling.
  • It can produce a smooth and matte finish on the bottom layer of your prints.
  • It can last for a long time and withstand multiple prints.

Disadvantages:

  • It can be difficult to remove prints from the surface, requiring the use of a spatula or a scraper.
  • It can be damaged by sharp or abrasive tools, requiring careful handling and removal.
  • It can be expensive and hard to apply without bubbles or wrinkles.

PEI Sheet

PEI (Polyetherimide) is a thermoplastic polymer that can offer a smooth and glossy surface for your prints. PEI sheets are usually attached to the print bed with an adhesive backing or a magnetic base. PEI sheets are known for their high temperature resistance and chemical stability.

Advantages:

  • They can provide strong adhesion for most materials when heated and easy release when cooled.
  • They can produce a shiny and smooth finish on the bottom layer of your prints.
  • They can be reused for many times without losing their effectiveness.

Disadvantages:

  • They can be prone to scratching and denting, requiring gentle handling and cleaning.
  • They can lose their adhesion over time, requiring occasional sanding or reapplication.
  • They can be expensive and hard to cut or trim to fit your print bed size.

Every once in a while, I come across a really cool application for 3d printing. In 2015, the ancient city of Palmyra in Syria suffered significant damage at the hands of ISIS terrorists, including the destruction of the iconic Arch of Triumph. Subsequently, the Institute for Digital Archaeology (IDA), in collaboration with UNESCO, used 3D technology to create a scale replica of the arch. They utilized existing 3D models, photographs, and the detailed documentation available from before the destruction. A 20-foot-tall replica of the arch was 3D printed in sections using a stone-like material, and these sections were assembled to create a near-identical replica. This replica was then displayed in various locations around the world, including London and New York City, as a symbol of defiance and resilience, and to promote the importance of preserving cultural heritage.

Lithopanes are 3D printed objects that reveal an image when backlit. They are a great way to create personalized gifts, decorations, or art pieces. However, 3D printing a lithopane is not as simple as uploading an image and hitting print. There are some considerations to take into account to ensure a successful result.

  • Choosing the right image: Not all images are suitable for lithopanes. Ideally, you want an image that has good contrast, sharp details, and no large dark areas. You also want to avoid images that have too many colors or gradients, as they will not translate well to the grayscale of the lithopane.
  • Preparing the image: Before you can 3D print your image, you need to convert it into a lithopane model. There are several online tools that can help you with this, such as Lithophane Maker or 3DP Rocks. These tools allow you to adjust the size, shape, thickness, and curvature of your lithopane, as well as apply some filters and effects to enhance the image quality.
  • Choosing the right material: The most common material for 3D printing lithopanes is PLA, as it is easy to print, biodegradable, and comes in various colors. However, you can also experiment with other materials, such as PETG, ABS, or even wood filament. The main thing to consider is the translucency of the material, as you want enough light to pass through the lithopane without compromising the image clarity.
  • Choosing the right settings: The settings for 3D printing a lithopane depend on your printer, material, and model. However, some general guidelines are to use a high resolution (0.1 mm layer height or lower), a low infill (10% or less), and a slow speed (30 mm/s or lower). You also want to avoid using supports, rafts, or brims, as they can damage the surface of the lithopane.
  • Print orientation: I have had the best success with lithopanes when I orient them vertically. This does pose a few challenges, specifically the small area that is actually attached to the printer bed, but a brim or a raft can help with this.
  • Finishing the lithopane: Once your lithopane is printed, you can remove it from the bed and trim any excess material. You can also sand or polish the surface to smooth out any imperfections. Finally, you need to find a suitable light source to display your lithopane. You can use a LED lamp, a candle, or even a smartphone flashlight. The important thing is to place the light behind the lithopane and adjust the distance and angle until you get the best effect.

Supports are tricky. You must create a fine balance. Too much support and your supports are difficult to remove and leave ugly marks. Too little support and everything falls apart. Today, I wanted to go over a few things that I consider when setting a print up that needs supports.

First, you need to decide whether you need supports or not. Cura has a handy feature that shows you the areas of your model that need supports in red. To enable this feature, go to the Preview tab and click on the eye icon on the top right corner. Then, select Show Overhangs from the drop-down menu. You will see the overhangs highlighted in red on your model.

If you see a lot of red areas, you might want to enable supports. To do this, go to the Prepare tab and click on the Support icon on the left sidebar. You will see several options for supports, such as Support Placement, Support Overhang Angle, Support Density, and more. Here are some tips for choosing the right settings:

  • Support Placement: This option lets you choose where to place the supports. You can choose Everywhere, which means the supports will touch both the build plate and the model, or Touching Build Plate, which means the supports will only touch the build plate and not the model.
  • Support Overhang Angle: This option lets you choose the minimum angle for an overhang to be supported. The default value is 50 degrees, which means any overhang that is less than 50 degrees from horizontal will be supported. You can increase or decrease this value depending on your model and your printer’s capabilities. A lower value will create more supports, which can improve print quality but also increase print time and material usage. A higher value will create fewer supports, which can save time and material but also risk print failure or poor quality.
  • Support Density: This option lets you choose how dense the supports are. The default value is 15%, which means 15% of the support area will be filled with material. You can increase or decrease this value depending on your model and your preferences. A higher value will create stronger and sturdier supports, which can help with complex or heavy models, but also increase print time and material usage. A lower value will create weaker and sparser supports, which can save time and material but also risk breaking or collapsing during printing or removal.
  • Support Interface: This option lets you choose whether to add an extra layer between the supports and the model. This layer can improve print quality by reducing marks or scars on the model surface caused by the supports. To enable this option, check the Generate Support Interface box. You will see two sub-options: Support Roof and Support Floor. The roof is the layer that touches the model from above, and the floor is the layer that touches the model from below. You can adjust the thickness and density of these layers according to your needs.

Your thermistor may not be reading correctly.

What is a thermistor and why is it important? A thermistor is a type of resistor that changes its resistance according to the temperature. It is used to measure the temperature of the hotend and the heated bed, which are important for maintaining the optimal printing conditions. If the thermistor is not working properly, it can cause inaccurate temperature readings, which can lead to poor print quality, filament jams, or even damage to the printer.

How can a thermistor degrade over time?

  • Mechanical stress: The thermistor is attached to the hotend or the heated bed with a wire, which can bend or break due to repeated movements or vibrations.
  • Thermal stress: The thermistor is exposed to high temperatures, which can cause it to expand and contract, resulting in cracks or fractures.
  • Environmental stress: The thermistor can be affected by dust, moisture, corrosion, or oxidation, which can alter its resistance or damage its coating.

How can you tell if your thermistor is degrading? There are some signs that can indicate that your thermistor is not functioning well, such as:

  • Inconsistent or fluctuating temperature readings: If your thermistor is losing its accuracy, you may notice that the temperature displayed on your printer’s screen or software is not stable or does not match the actual temperature of the hotend or the heated bed.
  • Erratic or failed prints: If your thermistor is giving wrong temperature readings, you may experience problems with your prints, such as under-extrusion, over-extrusion, stringing, warping, or layer separation.
  • Error messages or warnings: If your thermistor is broken or disconnected, you may see error messages or warnings on your printer’s screen or software, such as “Thermistor open”, “Thermistor short”, “MAXTEMP”, or “MINTEMP”.

How can you prevent or fix a degrading thermistor? There are some steps that you can take to prolong the life of your thermistor and avoid potential issues, such as:

  • Check and clean your thermistor regularly: You should inspect your thermistor for any signs of damage or wear and tear, and clean it with a soft cloth or a cotton swab if it is dirty or dusty.
  • Replace your thermistor if needed: If your thermistor is showing signs of degradation or malfunction, you should replace it with a new one as soon as possible. You can find compatible thermistors online or at your local 3D printing store. Make sure to follow the instructions on how to install and calibrate your new thermistor correctly.
  • Upgrade your thermistor if possible: If you want to improve the performance and reliability of your thermistor, you can consider upgrading it to a more durable and accurate type, such as a PT100 or a thermocouple. These types of thermistors can withstand higher temperatures and are less prone to degradation. However, they may require additional hardware or firmware modifications to work with your printer.

If you own a 3D printer, you may have encountered a frustrating problem: the bed level undoing itself. This can result in poor print quality, wasted filament, and even damage to your printer.

One possible cause of the bed level undoing itself is thermal expansion. As the printer heats up, the metal parts expand and contract, which can affect the alignment of the bed and the nozzle. To prevent this, you should make sure that your printer is in a stable environment, with minimal temperature fluctuations. Bring your bed to the proper temperature and let it heatsoak for a few minutes.

There are screws that go through the center of the bedsprings with nuts at the end of them. Check the screws and springs that hold the bed in place, and tighten them if they are loose.

Another possible cause of the bed level undoing itself is vibration. As the printer moves, it can generate vibrations that can loosen the screws and springs that hold the bed in place. To prevent this, you should make sure that your printer is on a solid and level surface, and that it is not exposed to external sources of vibration, such as fans or speakers. You should also check the belts and pulleys that drive the printer’s motion, and adjust them if they are too loose or too tight.

A third possible cause of the bed level undoing itself is wear and tear. Over time, the parts of your printer can wear out or break, which can affect the bed level. For example, the springs that hold the bed in place can lose their tension, or the bearings that guide the motion of the printer can wear out. To prevent this, you should regularly inspect your printer for signs of damage or wear, and replace any parts that are faulty or worn out.

A simple solution that many people opt for is to change out their springs for better quality springs or silicone spacers. They are relatively inexpensive and provide much better support than most factory installed springs.

One last thing to check is the z axis limit switch(es). If the machine homes too high above the build plate, there may not be enough tension on the springs to keep it in place properly. Resetting the limit switch(es) can help by applying tension on the springs and stabilizing the bed height.

One of the most important parameters to adjust when slicing a 3D model for printing is the layer height or step height. This is the thickness of each layer that the printer will deposit on top of the previous one, and it affects the quality, speed and strength of the print. I would like to discuss some of the things to consider when setting a step height in a 3D printer slicer.

The first thing to consider is the resolution and detail of your model. If you want to preserve fine details and smooth curves, you will need to use a lower layer height, as this will reduce the visible stair-stepping effect that occurs when printing curved surfaces. However, if your model is simple or has large flat areas, you can use a higher layer height, as this will not affect the appearance much.

The second thing to consider is the printing time and cost. The lower the layer height, the more layers you will need to print, and the longer it will take to finish the print. This also means that your printer will be unavailable for longer. No big deal if you are a hobbyist, but if you have a hourly price associated with your printer it can really increase the cost of your prints. On the other hand, the higher the layer height, the fewer layers you will need to print, and the faster it will finish.

The third thing to consider is the strength and durability of your print. The lower the layer height, the better the adhesion between layers, and the stronger your print will be. This is especially important if you are printing functional parts that need to withstand stress or impact. However, if you are printing decorative or non-functional parts, you can use a higher layer height, as this will not affect the strength much.

There is no single optimal layer height for every print. You will need to balance these factors and choose a layer height that suits your needs and preferences. A good rule of thumb is to start with a layer height that is half of your nozzle diameter, and adjust it up or down depending on your model and desired outcome.

Also, consider “magic numbers.” For most hobbyist FDM printers ideal step heights are in increments of 0.04mm.

Z wobble is a common problem in 3D printing that causes the printed layers to shift or wobble along the Z-axis, resulting in a distorted or uneven surface. Z wobble can be caused by various factors, such as loose screws, bent rods, misaligned couplers, or poor quality lead screws. To fix Z wobble, you need to identify the source of the problem and make sure that all the components of the Z-axis are properly aligned, tightened, and lubricated. Here are some steps you can take to reduce or eliminate Z wobble:

  • Check the screws that hold the Z-axis rods and lead screws in place. Make sure they are not too loose or too tight. You can use a hex wrench to adjust them if needed.
  • Check the rods and lead screws for any bends or damage. If they are bent, you can try to straighten them using a hammer or a vise. If they are damaged, you may need to replace them with new ones.
  • Check the couplers that connect the lead screws to the stepper motors. Make sure they are not cracked or worn out. You can use a screwdriver to tighten them if needed.
  • Check the alignment of the Z-axis rods and lead screws. They should be parallel to each other and perpendicular to the X-axis and Y-axis. You can use a ruler or a level to measure the angles and distances between them.
  • Lubricate the rods and lead screws with a suitable grease or oil. This will reduce the friction and noise and improve the smoothness of the Z-axis movement.