Although there are a couple of things that can cause parts to curl, I have found that it is usually related to the environment that the printer is in. If your parts initially print good layers, and then the print curls up away from the bed I would initially start to investigate whether the printer is in line with an HVAC vent or in a very drafty area. Ideally, put it in an enclosure.
Tag: 3dprinting
I saw on a forum someone who was having problems with their mesh bed level. The advice that they were given was to disable the feature and use the screws tilt adjust features in the firmware. Here is what each of those features do.
Screws tilt adjust, in most firmware packages, allows you to set the distance between the bed and the nozzle. It does this in each of the four corners of the bed and in the center of the bed. The benefit of doing it this way is that it’s pretty simple to get started and the results are typically decent. No need to fix it if it ain’t broke. The downside of this method is that it assumes a pretty flat bed in between those points. If it isn’t, the firmware won’t be able to account for the variations simply because they haven’t been compensated. This was my situation. After replacing a warped bed a number of times I decided that it was time to do something different.
Mesh bed level. This method is more work to get set up, but it does account for a warped bed. To set up a mesh bed level, the firmware will allow the user to select a grid, usually 3×3 or 5×5. This grid is used to compensate for any warpage that may be present in the bed.
My typical approach is to mechanically make the bed as flat as possible. By adjusting the clamping pressure on each corner of the bed you can manipulate it to flex more. For now, don’t worry about the orientation, we’ll deal with that later. Once you get a bed that’s pretty flat, let’s go ahead and adjust the bed screws manually. Run the function to adjust the bed screws and make sure that your orientation is as good as you can make it. Next, adjust your mesh bed level. Some people do this before each print, I don’t. My environment is pretty stable so I just leave mine set up and run a mesh bed level from time to time.
A lot of times I’ll see someone asking for help online that goes something like this:
“I just changed the bed on my 3d printer to XYZ, bought a new extruder from LMNOP brand, updated my retraction, temperature, and speed settings, and now nothing works. How do I fix it?”
My advice to these folks is almost always to back it up a bit. What ends up happening is that they change so many things all at once that it’s impossible to tell which configuration change or setting change was the one that threw everything off.
I recently turned on and homed my 3d printer, only to find it grinding against the side shortly afterwards. Here is what I found. I did a quick check of my limit switches (seems to be a common cause) and found out that they are good. It turned out not to be necessary for me, but I could also have checked the voltage to the motors.
What it turned out to be was that the cable that provides power to the hotend fell down in front of the limit switch. Then when I homed it, the axis wasn’t able to reach the limit switch. The fix involved a quick zip tie of the cable harness to make sure it didn’t happen again.
Each 3d printer owner buys their printer for their own reason. Some of the most common reasons are that they enjoy making models or that they like to tinker and invent. I do both. I picked up a ceiling fan for $10. It was listed so cheap because it was missing a piece. A small plastic piece. Ha! I thought, this is perfect. I’m teaching my two boys about design, drafting (on paper) and cad drafting. This was a perfect real-world opportunity to have them put their skills to use. We looked up the OEM piece online, took some measurements on our parts to get the sizes right, sketched out some ideas on paper, then created some cad files. Bing bang boom! For about $0.05 we now have a working fan, but the lessons that they learned are worth so much.
After a while, things wear out on your printer. One item that is often overlooked is the connection on either end of a Bowden tube. If the teeth that hold the tube in place aren’t doing their job correctly, the tube can move back and forth as the extruder extrudes and retracts filament. The result of this is that you can end up with zits and voids in your final print.
To fix this, replace the fittings on either end first. If it still happens, replace the tube too.
Just like checking your oil and your tire pressure on your car every once in a while, you should run a quick check on the overall health of your printer from time to time, as well.
My preferred way to do this is to print a Benchy model. There are other torture tests, but once you know what you are looking for with this model, it can tell you a whole lot. It is not a diagnostic tool, in the sense that it will tell you what adjustments to make, but it does tell you if there is a problem so that you can do some additional investigation, if needed. Benchy features include, bridging, holes of all types and angles, retraction, fine details, etc.
There are a lot of potential causes for stringing, or spider webs. Some of the most common are poor retraction settings, poor temperature settings, and an improperly calibrated extruder.
Also, keep in mind that ambient temperature can affect stringing if you don’t have an enclosure.
The first thing that I do if I find that my printer is stringing is print a retraction tower, a temperature tower, and recalibrate my extruder. This takes 30 minutes and saves tons of time.
Banding, or horizontal lines in your 3d print, can come from many things. A few possible causes are:
- overextrusion
- poor PID tuning
- loose belts
- poor calibration of extruder
- eccentric nuts for roller bearings not tightened properly
Why get a 3d printer? What value do they bring? Personally, I think they solve many problems that the manufacturing industry has struggled with. Prototyping, for example, comes to mind. It might take the tool shop a week to build a prototype part just to see if something will fit in an assembly. If you just need to check the overall envelope, you can often do it much quicker on a 3d printer and iterate through the design process.
Personally, I use mine all the time to solve problems at home. My wife can’t find curtain tie backs that she likes? Fine, she can just sit with me while I design something and then I’ll print it for her.
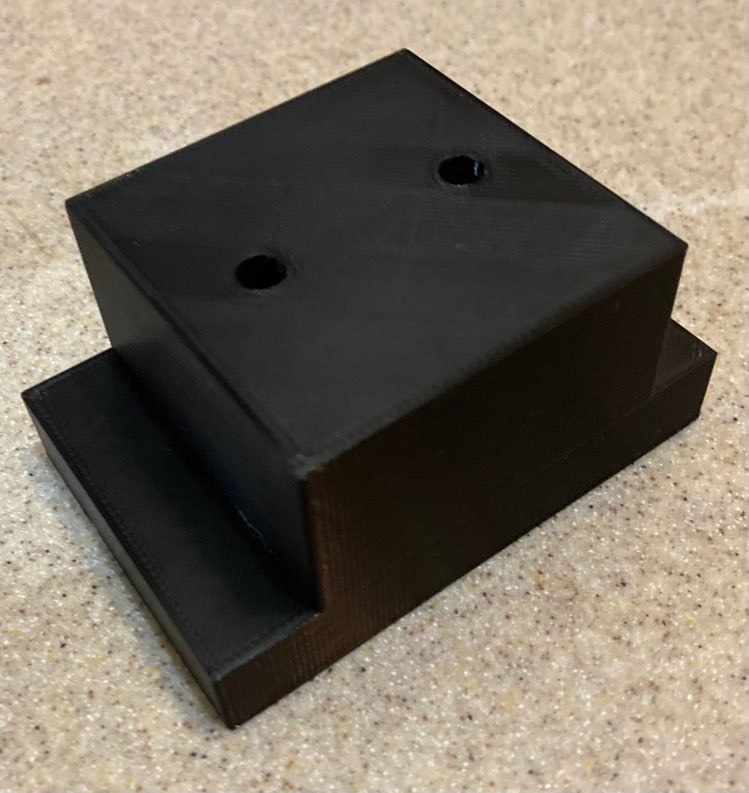
We inherited a TV over the weekend. My father-in-law had it mounted on a wall in his workshop and he had thrown away the feet for it several years ago. He gave it to us and I thought it would be a good learning opportunity for my kids to learn how to solve problems. I had them design some feet for it. Their first step was to create a drawing on paper. I’m old fashioned. I still believe that if you can’t put it on paper then you probably have no business trying to put it on cad. Once I approved of their design they had to sit down and draft their new idea. Then they had to print it. What you see below is how a 10 year old solved the problem of a TV having no feet.