Tools You’ll Need

  • A hex key or screwdriver (depending on your printer’s bed screw type)
  • A piece of standard printer paper
  • Your 3D printer’s control interface (for moving the print head)

Step 1: Preheat Your Printer

Preheating your 3D printer to its typical printing temperature is crucial for accurate bed leveling. Temperature variations can cause the bed to expand or contract, affecting the leveling process. Preheat both the nozzle and the bed to ensure all components are at their working temperature.

Step 2: Home the Print Head

Use your printer’s control interface to home the print head. This positions the print head at its starting point, ensuring that the bed leveling process is consistent from one corner to the other.

Step 3: Disable Stepper Motors

After homing the print head, disable the stepper motors (usually through a menu option on your printer). This allows you to manually move the print head and bed without affecting their positions in the printer’s memory.

Step 4: Adjust the Bed Screws

  1. Position the nozzle over the first corner of the bed. Manually move the print head so the nozzle is positioned over the first adjustment screw at one corner of the bed.
  2. Use the paper method. Slide a piece of standard printer paper between the nozzle and the bed. You should feel a slight resistance when moving the paper. If the paper moves too freely, the bed is too low. If you can’t move the paper, the bed is too high.
  3. Adjust the screw. Using the hex key or screwdriver, turn the adjustment screw to raise or lower the bed. Clockwise turns will lower the bed (if the screw is on top of the bed) or raise it (if the screw is underneath), and counterclockwise turns will do the opposite. Adjust until you feel slight resistance on the paper.
  4. Repeat for all corners. Move the print head to each corner of the bed, repeating the adjustment process. It may take a few rounds of adjustments to get the level just right, as changing one corner can affect the others.

Step 5: Check the Center of the Bed

Once all corners are adjusted, move the nozzle to the center of the bed and check the resistance with the paper again. The center should also have slight resistance. If not, you may need to adjust the corners again or consider using a glass bed or bed leveling sensor for more uniform leveling.

Step 6: Test with a Print

After leveling, it’s a good idea to run a test print. Choose a design with a large, flat bottom layer to help you see how evenly it adheres across the entire bed.

Final Thoughts

Adjusting the bed screws on your 3D printer is a vital step in achieving the perfect first layer and ensuring successful prints. While it might seem tedious at first, with practice, it will become a quick and routine part of your printing process. Happy printing!


Are you venturing into the world of 3D printing and looking to leverage Fusion 360 for designing your models? Fusion 360 is a powerful tool that bridges the gap between professional-grade design and the personal customization that 3D printing offers. However, knowing how to optimize your design for 3D printing can be the difference between a successful print and a failed attempt.

Know Your Printer Inside and Out

Before you dive deep into designing, take a moment to understand the capabilities and limitations of your 3D printer. The print resolution, including layer height and nozzle diameter, sets the boundary for the smallest details you can effectively design. Additionally, keep your designs within the build volume of your printer to avoid unnecessary scaling or partitioning later.

Design with 3D Printing in Mind

  • Wall Thickness: Ensure your model has walls thick enough to be structurally sound yet not so thick that they waste material or extend print times unnecessarily.
  • Overhangs and Supports: Design to minimize overhangs that exceed 45 degrees to avoid the need for extensive support structures, which can be a hassle to remove and can mar the surface of your print.
  • Orientation: Strategically orient your design in Fusion 360 to take advantage of the print’s strongest axes, enhancing the structural integrity and surface quality of your final print.

Utilize Smart Design Features

  • Tolerance and Fit: Account for material shrinkage and printer precision by designing parts with appropriate tolerances, ensuring assembled parts will fit together as intended.
  • Hollowing Out Parts: Consider hollowing out solid models to save on printing time and filament. Don’t forget to add holes to allow for the removal of any internal support material.

Prepare Your Model Like a Pro

  • Correct Format: Export your design in a format compatible with your 3D printer, typically STL or OBJ, and ensure the resolution settings match your printer’s capabilities.
  • Mesh Repair: Take advantage of Fusion 360’s mesh repair tools to check and fix any issues in your model before printing, avoiding common problems like holes or non-manifold edges.

Embrace Simulation and Prototyping

  • Use Simulation Tools: Fusion 360 offers simulation features that can help predict and visualize how your design will behave under real-world conditions. Adjust your model based on these insights for the best performance.
  • Prototype for Perfection: If resources allow, print a prototype of your design to test for form, fit, and function. This step can save you time and material in the long run by identifying issues early.

Stay Informed and Engaged

  • Software Updates: Fusion 360 is continuously updated with new features and improvements. Keeping your software up to date ensures you have access to the best tools.
  • Leverage Community Knowledge: The Fusion 360 community is an excellent resource for tips, tutorials, and troubleshooting advice. Engaging with this community can provide valuable insights and inspiration.

Fusion 360 offers a comprehensive suite of tools for 3D modeling, making it an indispensable resource for those involved in 3D printing. One of the software’s capabilities is the insertion of images onto models, a feature that enhances the customization and detailing of prints. This guide will walk you through the process of adding an image to your model in Fusion 360, providing a straightforward method to elevate your 3D printing projects.

Opening Your Project

Initiate the process by launching Fusion 360 and opening your project file. Ensure you are in the appropriate workspace that corresponds to your modeling needs, as this setup is crucial for the steps that follow.

Inserting an Attached Canvas

  • Access the “Insert” menu found on the toolbar at the top of the screen.
  • Choose “Attached Canvas” from the dropdown. A dialog box will appear, prompting you to select the face of the model where the image will be placed. This step is critical as it determines the positioning of your image on the model.

Selecting Your Image

  • In the dialog box, click “Select Image” to browse your computer for the desired image file. This image can be a logo, a texture, or any graphic that suits your project’s requirements.
  • Once selected, the image will be attached to the chosen face of the model.

Adjusting the Image

  • Fusion 360 allows for precise adjustments to the image’s placement and size. Utilize the scaling, rotating, and moving tools to align the image according to your specifications.
  • Adjustments can be made by interacting with the handles that appear around the image or by entering specific values for a more precise placement.

Finalizing and Preparing for 3D Printing

  • Confirm the adjustments by clicking “OK.” Your model will now include the image, ready to be incorporated into your 3D printing process.

In the realm of 3D printing, material choice can significantly impact the outcome of your projects. Among the plethora of options, PETG stands out as a versatile and user-friendly filament. This post dives into the world of PETG, exploring its applications, benefits, and how it stacks up against other popular materials.

What is PETG?

PETG, or Polyethylene Terephthalate Glycol-modified, is a thermoplastic polyester that offers the best of both worlds: the simplicity and safety of PLA and the strength and durability of ABS. It’s known for its ease of use, excellent layer adhesion, and low shrinkage, making it a favorite among both beginners and experienced users.

Uses of PETG

PETG’s remarkable flexibility and strength make it suitable for a wide range of applications:

  • Functional Parts: Its durability is perfect for mechanical parts or items subject to stress.
  • Medical Devices: PETG is food-safe and can be sterilized, making it ideal for medical applications and containers.
  • Outdoor Use: With its UV and weather resistance, PETG is great for outdoor applications.
  • Cosmetic Prints: Its glossy finish and clear variants can produce visually appealing objects.

Pros of PETG

Durability and Flexibility: PETG offers superior durability and flexibility compared to PLA, without the brittleness.

Chemical Resistance: It’s resistant to many chemicals, making it suitable for practical applications in harsh environments.

Low Shrinkage: PETG minimizes warping, aiding in the production of large prints and complex geometries.

Food Safe: When used with a food-safe extruder, PETG can be suitable for creating containers that come into contact with food.

Cons of PETG

Stringing: PETG can produce stringing or oozing, requiring fine-tuning of retraction settings.

Adhesion: Its excellent layer adhesion can make it difficult to remove from the print bed without a proper surface or settings.

Temperature Sensitivity: Achieving the right printing temperature is crucial, as PETG can be prone to blobs and zits if printed too hot.

PETG vs. Other Materials

Vs. PLA: PETG is more heat resistant and durable than PLA, making it better for functional parts. However, PLA is easier to print with and provides more vibrant color options.

Vs. ABS: PETG offers similar strength and temperature resistance to ABS but with less toxic emissions and easier printability. ABS, however, can achieve a smoother finish through acetone smoothing.

PETG filament is a robust, versatile material that bridges the gap between PLA’s ease of use and ABS’s strength. Whether you’re crafting durable functional parts, medical devices, or weather-resistant outdoor applications, PETG presents a compelling choice. Understanding its pros and cons can help you leverage its capabilities to enhance your 3D printing projects.

Welcome to the essential guide for every new 3D printer enthusiast! Understanding when to replace your printer’s thermistor can save you time and improve your printing experience.

What is a Thermistor?

A thermistor monitors your 3D printer’s temperature, crucial for precise printing. It’s a resistor whose resistance changes with temperature, ensuring your printer operates within the right temperature range.

Signs of a Failing Thermistor

  1. Inconsistent Prints: If your prints start varying in quality without changes in settings, it could be a thermistor issue.
  2. Error Messages: Many printers display specific error messages indicating thermistor problems.
  3. Temperature Fluctuations: Sudden changes in temperature readings on your printer’s display are a red flag.

How to Test a Thermistor

  1. Disconnect and Measure: Turn off and unplug your printer. Use a multimeter to measure the thermistor’s resistance. Compare it to the standard resistance values provided in your printer’s manual.
  2. Temperature Test: Heat the thermistor (using a safe, controlled method). Measure resistance as it heats. If the resistance doesn’t change as expected, it’s time for a replacement.

Replacing a Thermistor

  1. Purchase the Right Replacement: Ensure you get a compatible thermistor for your printer model.
  2. Installation: Carefully follow your printer manufacturer’s guidelines for replacing the thermistor. This usually involves disconnecting the old thermistor and connecting the new one, securing it in place.

Conclusion

Keeping an eye on your thermistor’s performance is key to maintaining your 3D printer’s reliability and print quality. By recognizing the signs of a failing thermistor and knowing how to test and replace it, you’re set for a smoother 3D printing journey.

In the intricate world of 3D printing, a smooth filament path is essential for flawless prints. However, every enthusiast eventually faces the challenge of broken filament stuck inside a PTFE (Polytetrafluoroethylene) tube. This guide will walk you through the steps to efficiently remove stuck filament, ensuring your 3D printing journey continues without a hitch.

Understanding the Problem

Filament can break off inside the PTFE tube due to various reasons such as abrupt printer movements, improper filament storage, or simply using low-quality filament. This creates a blockage that can affect extrusion quality and may even halt your printing projects altogether.

Tools You’ll Need

  • Needle-nose pliers
  • A 1.5mm or appropriate size Allen key or push rod
  • Heat gun or hair dryer
  • A new filament segment

Step-by-Step Solution

1. Preparation

First, ensure your 3D printer is turned off and cooled down to avoid any risk of injury. Remove any filament spools attached to the extruder to reduce tension in the system.

2. Accessing the PTFE Tube

Carefully disconnect the PTFE tube from the extruder and hot end. Depending on your printer model, this might require loosening a fitting or pressing down on a quick-release.

3. Heating the Stuck Filament

Using a heat gun or hair dryer, gently heat the section of the PTFE tube where the filament is stuck. The goal is to soften the filament without damaging the tube. Keep the heat source moving to distribute heat evenly.

4. Pushing the Filament Out

Once the filament softens, use the Allen key or push rod to gently push the stuck filament through the tube. If accessible, needle-nose pliers can be used to pull the filament out from the other end.

5. Clearing Any Residue

After removing the bulk of the filament, inspect the tube for any remaining bits. If necessary, repeat the heating and pushing process until the tube is clear.

6. Reassembly and Testing

Reattach the PTFE tube to your printer, ensuring all connections are secure. Feed a new filament segment through to test for smooth passage.

Preventive Measures

  • Use High-Quality Filament: Investing in good quality filament reduces the risk of breakage.
  • Regular Maintenance: Periodically check and clean your PTFE tube to prevent buildup that can lead to filament breakage.
  • Proper Storage: Store filament in a dry, cool place to prevent brittleness.

In the world of 3D printing, achieving the perfect print is akin to an art form, requiring precision, patience, and a keen eye for detail. One fundamental aspect often overlooked by novices and seasoned enthusiasts alike is the importance of keeping the 3D printer bed level. This seemingly minor detail can significantly impact the quality of your prints.

The Importance of a Level Bed

Preventing Warping and Misprints: A level bed ensures the first layer of your print adheres evenly across the surface. An uneven bed can lead to parts of the print not sticking to the bed, causing warping or complete print failures.

Enhancing Adhesion: Good adhesion is crucial for a successful print. A level bed ensures uniform contact between the print and the bed, reducing the chances of the print coming loose mid-process.

Improving Print Quality: A level bed contributes to consistent layer height. This uniformity is essential for achieving smooth surfaces and accurate dimensions in your prints, especially for detailed models.

Tips for Maintaining a Level Bed

  1. Regular Checks: Before each print, do a quick check to ensure the bed is level. Environmental changes can affect bed leveling over time.
  2. Use the Right Tools: Utilize feeler gauges or a piece of paper to check the gap between the nozzle and the bed at various points.
  3. Follow Manufacturer Instructions: Each printer has its method for bed leveling. Familiarize yourself with your printer’s specific process for best results.
  4. Consider Upgrades: If you’re struggling with leveling, consider upgrading to a printer with auto-leveling features or adding an aftermarket auto-leveling sensor.

Maintaining a level 3D printer bed is a critical yet often overlooked aspect of 3D printing. Regular checks and adjustments can vastly improve print adherence, quality, and success rates. By incorporating these practices into your 3D printing routine, you’ll notice a significant improvement in your prints and reduce the frustration of failed prints due to leveling issues.

3d printing and Dungeons & Dragons. Dungeons and Dragons (D&D), the legendary fantasy role-playing game, has captured the imaginations of players for decades. With its intricate storylines, detailed characters, and the plethora of game pieces involved, staying organized is key to a smooth gaming experience. Many people use 3D printers to create miniatures and tabletop displays. But what other ways can 3D printers be useful to the D&D enthusiast?

  1. Miniature Storage: Miniatures are central to D&D gameplay, and players often accumulate a large collection. 3D printed storage solutions can range from simple trays with individual compartments to elaborate cases designed for specific types of miniatures. Some designs even incorporate thematic elements from the game, like dungeon or forest themes, to enhance the aesthetic appeal.
  2. Dice Towers and Trays: Dice are another integral part of D&D. 3D printed dice towers and trays not only provide a convenient way to roll dice but can also be customized with intricate designs, game themes, and personal motifs. They help in keeping dice rolls fair and contained, adding a fun and functional element to the gaming table.
  3. Character and Campaign Organizers: For players and Dungeon Masters alike, keeping track of characters, campaigns, and various notes can be a daunting task. 3D printed organizers can include slots for character sheets, compartments for notes, and sections for campaign books or tablets. These organizers can be customized for individual campaigns or players.
  4. Spell and Ability Trackers: Managing spells and abilities during gameplay can be complex. 3D printed trackers, often designed with rotating parts or sliders, offer a visual and practical way to keep track of spells used, cooldowns, or other abilities. These trackers can be tailored for different classes or characters.
  5. Token and Marker Holders: Tokens, markers, and other small items are frequently used in D&D games. 3D printed holders or boxes with compartments help keep these items organized and easily accessible during play. Designs can vary from simple boxes to more elaborate holders with specific slots for different types of tokens.
  6. Terrain and Map Storage: For those who use physical terrain pieces or maps, storage can be tricky due to their size and shape. Custom 3D printed storage solutions can be created to fit these items, ensuring they are protected and easy to transport.
  7. Custom Boxes and Carry Cases: For the ultimate in organization and portability, custom 3D printed boxes or carry cases can hold everything a player or DM needs. These cases can be designed with compartments for all the above-mentioned items, often featuring modular designs that can be rearranged as needed.

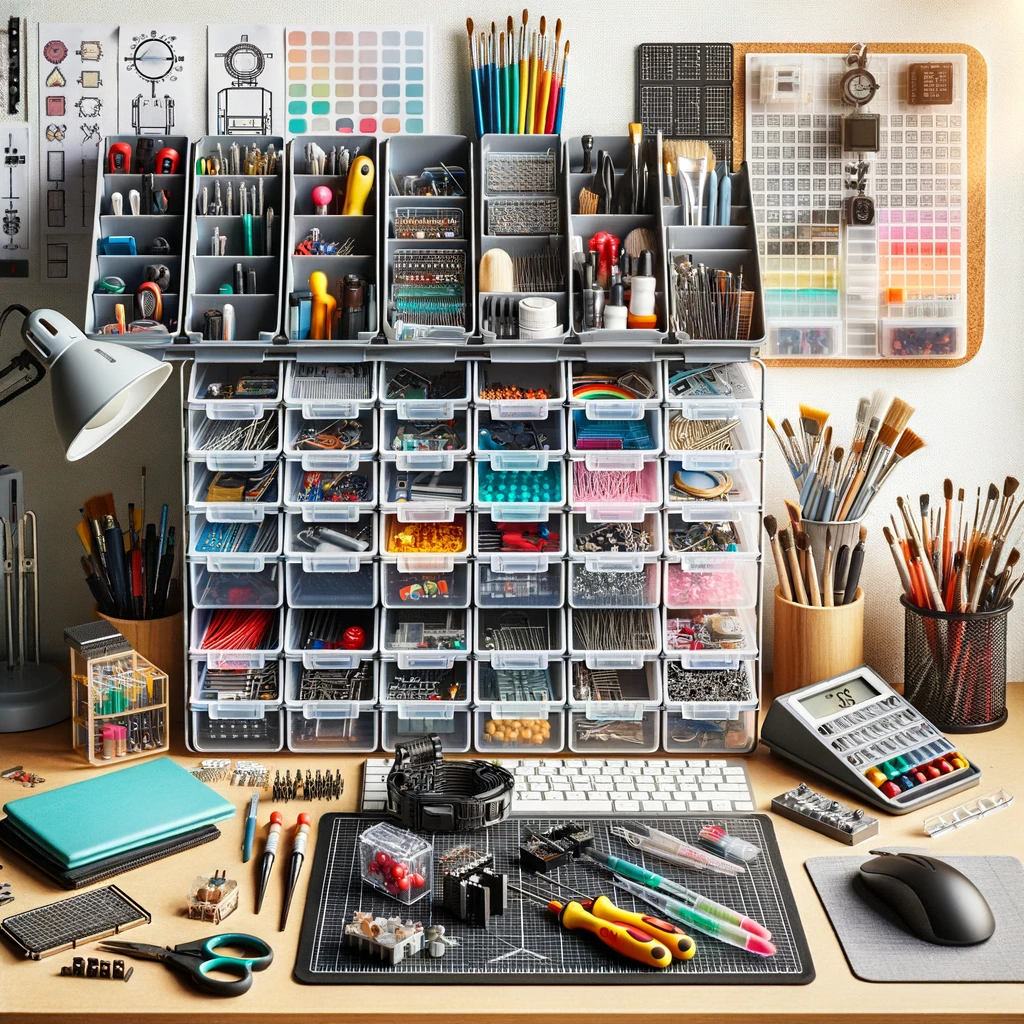
In the world of 3D printing, staying organized can be as challenging as it is crucial. Enter Gridfinity, a modular system that’s changing the game for makers, hobbyists, and professionals alike. This innovative approach to organization is not just practical; it’s customizable and endlessly versatile. Let’s dive into what makes Gridfinity the next big thing in 3D printing and organization.

What is Gridfinity? Gridfinity is a system of interlocking bins, trays, and holders designed to keep workspaces organized and efficient. Born from the creative minds of 3D printing enthusiasts, it embodies the spirit of customization and DIY. The system’s key feature is its grid-like structure, which allows for various components to be easily arranged and rearranged to suit individual needs.

The Appeal of Gridfinity

  • Customizable: Tailor your setup to your specific tools, components, and workspace.
  • Scalable: Start small and expand as your collection grows. Gridfinity grows with you.
  • Accessible: All you need is a 3D printer to create your own Gridfinity components, making it a highly accessible system for anyone with a 3D printer.

Common Uses of Gridfinity

  • Organizing Tools and Supplies: Perfect for keeping screwdrivers, pliers, nuts, bolts, and other tools neatly arranged.
  • Electronics Workstations: Ideal for electronic hobbyists who need to organize components like resistors, capacitors, and chips.
  • Crafting and Art Supplies: Keep your crafting area tidy, with a place for every paintbrush, bead, and spool of thread.
  • Office Supplies: Transform your desk with custom holders for pens, paper clips, and other office essentials.

Designing Your Gridfinity System Creating your own Gridfinity setup is a journey of creativity. You can find pre-designed models online or design your own using 3D modeling software. The beauty of Gridfinity lies in its adaptability; you can create a system that perfectly fits your space and needs.

Community and Collaboration One of the most exciting aspects of Gridfinity is the community that’s growing around it. Users share their designs, improvements, and setups online, fostering a collaborative environment where everyone can benefit from shared ideas and innovations.

Gridfinity represents more than just a way to organize; it’s a testament to the ingenuity and collaborative spirit of the 3D printing community. Whether you’re a seasoned maker or just starting, Gridfinity offers a flexible, scalable solution to bring order to your creative chaos.

3D printing, a marvel of modern technology, has evolved from a niche hobby to a mainstream phenomenon. This transformative process of creating three-dimensional objects from digital files has found its way into various sectors. In this post, we’ll explore the most commonly 3D printed items, showcasing the versatility and creativity this technology affords.

1. Prototypes and Models

  • Overview: Prototyping is perhaps the most significant and widespread use of 3D printing. It allows designers and engineers to transform their ideas into tangible models quickly.
  • Examples: From automotive parts to architectural models, prototypes are essential in various industries for testing and visualizing concepts before mass production.

2. Customized Phone Cases

  • Overview: The demand for personalized items has led to the popularity of 3D printed phone cases. These cases can be tailored to individual styles, preferences, and needs.
  • Examples: Intricate designs, personalized names, and unique textures are common themes in 3D printed phone cases.

3. Home Decor and Utensils

  • Overview: 3D printing has found a place in interior design and home utility, allowing for the creation of customized and unique home goods.
  • Examples: Items like vases, lampshades, coasters, and even kitchen utensils are popular for their customizable nature and the personal touch they add to homes.

4. Jewelry and Fashion Accessories

  • Overview: The fashion industry has embraced 3D printing for its ability to produce intricate, customizable designs that are difficult to achieve through traditional methods.
  • Examples: Earrings, necklaces, bracelets, and even high-fashion pieces like avant-garde headdresses are being 3D printed.

5. Educational Tools and Toys

  • Overview: Education and play are fundamental areas where 3D printing has made a significant impact, especially in creating tailored educational aids and unique toys.
  • Examples: Custom puzzles, anatomical models for medical training, and educational toys that cater to specific learning needs are widely 3D printed.

6. Artistic Sculptures and Figures

  • Overview: Artists are leveraging 3D printing to bring their imaginative concepts to life in three dimensions.
  • Examples: Sculptures, figurines, and artistic installations that were once limited to traditional materials are now being created with 3D printers.

7. Medical Models and Prosthetics

  • Overview: The medical field has seen groundbreaking applications of 3D printing, especially in creating patient-specific models and devices.
  • Examples: Custom prosthetics, dental implants, and anatomical models for surgical preparation are increasingly being 3D printed for their precision and customization capabilities.

The applications of 3D printing are as diverse as they are revolutionary. From everyday items to sophisticated industrial components, this technology is reshaping how we create and think about objects. As 3D printing technology continues to advance, we can expect to see even more innovative and exciting uses in various fields.