
I saw a question from a new 3d printer who was asking about their filament not being pushed through, but they were definitely able to see the gears on the extruder turning. It is possible that the filament tensioner at the extruder end is not tight enough and not gripping the filament. The other possibility is a clogged nozzle. If you end up with this condition, an easy way to unclog your nozzle that works 75% of the time is to heat up the nozzle to 260 and then push the filament through by hand. Usually this removes the clog. If this doesn’t work, you will need to unclog it by following the steps in one of my previous posts: https://www.3dprinterrx.com/clogged-nozzle/
Category: Troubleshooting
After a while, everything wears out, 3d printer components included. I noticed, not too long ago, that my bowden tube kept slipping out of the pneumatic fitting attached to the extruder. Whenever the extruder would feed filament it would push the tube out too.
Upon investigation, I found that there are little “teeth” inside of the pneumatic fitting the keep the tube in place. Pushing down the little plastic ring disengages the teeth and allows the tube to slip out. Over time, the teeth had worn out and needed to be replaced. On most extruders, this is a simple fix. Just find the right size pneumatic fitting and replace it.
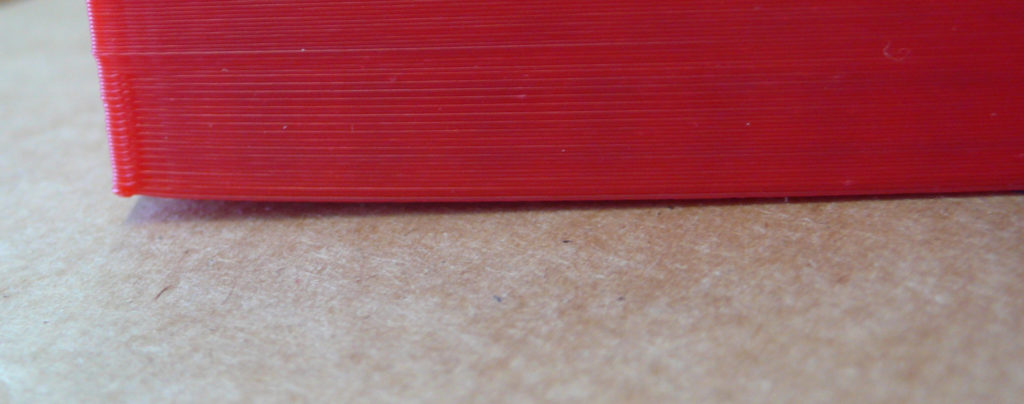
I see a lot of people wondering why their 3d prints have little zits and voids in them. One of the potential reasons is because their filament has collected moisture. Filament is porous and collects moisture over time. Most filament manufacturers do a pretty good job of ensuring that filament is dry when it gets to you, but not always. Usually, moisture is absorbed when filament sits around in the house for a while.
When water is heated to 200 °C, like when you are printing with PLA, it turns to steam and then escapes, leaving little pockets on the surface of the project.
To ensure that you don’t have to worry about this, make sure that your filament is dry. You can do this by vacuum packing your filament if you aren’t going to use it for a while, using a filament dryer or food dehydrator to dry out filament before use, and keeping desiccant near the filament to absorb the moisture from your filament.
Symptoms of a poor bed level include:
- print not sticking to the bed
- nozzle scraping bed
- thin or see-through first layer
When I get this, there are a couple of things that I check. First I check the printer mechanically:
- Disable any BLTouch probing
- Level the bed using a paper or feeler gage
- Create mesh bed level manually
- If troubleshooting, run a test print.
- Enable BLTouch probing
- Create automatic bed level
- Run test print
From following these steps, you should be able to accurately diagnose where the problem with your bed level lies. Address accordingly.
I’ve seen a number of help requests lately that have to do with clogged nozzles. I’ll share how I go about unclogging nozzles, but I will also share how I deal with clogged nozzles afterwards.
To unclog a nozzle, the first thing I do is heat up the hotend as high as the software will allow. This can help break down any clogs that may be in the nozzle into smaller pieces and allow them to pass through. Next, I’ll take a small pin or needle and carefully push it into the nozzle and try to remove any material that I find there.
If that is not successful, the next thing I will try is a cold pull. Heat the nozzle up and then let it cool down completely. The idea is that (hopefully) any impurities will be absorbed into the filament so that we can pull it out when it solidifies. Next, I typically remove the bowden tube connection so that I can pull on the filament directly. Heat up the hot end and start pulling gently, but firmly on the filament. You will feel it start to give at a certain temperature. Pull it all the way out and cut the tip off. This should remove some of the impurities that were previously stuck in the nozzle. Do this 2-3 more times.
If you are not successful with either of these methods, I just replace the entire hot end. For most hobby printers, hot ends cost $10 – $20. I usually keep a spare on hand and just swap it out.
When working with a bed level, sometimes you find that your bed is level but it is not flat. Mine, for example, is raised in the center. Because of this, it is impossible to use a standard bed level procedure. You need to use a mesh bed level. This feature doesn’t come enabled on all printers, I had to update my firmware to be able to do a mesh bed level. How a mesh bed level works is it breaks the bed down into smaller “tiles.” On mine, the tiles are approximately 60mm x 60mm. This allows the compensation to follow the contour of the bed instead of assuming that the bed is perfectly flat. As I always say, don’t try to solve a mechanical problem with software. Level your bed first, as best as you can. Then incorporate the mesh bed level. Make sure that you heat up your bed for 15-30 minutes before you do the mesh bed level so that your bed will take the shape it will be in while printing. Store your bed level profile and make sure that you activate it before you start printing. I typically do a new mesh bed level in the summer, in the winter, and anytime that something significant changes on my printer.
So, what’s a good amount of deviation for a mesh bed level? A good general rule of thumb is 0.1mm. If you can get your deviation at 0.1mm or better, then (for hobby purposes) you are doing pretty good.
Someone recently showed a picture of their 3d printed 25mm calibration cube. Unfortunately for them, however, it was not a cube at all. It was a 25mm x 12.5mm x 20mm shape.
When digging into the problem a little bit, it turns out that they had changed some stepper motors and firmware and accepted all of the default values. If the firmware has not been specifically written for your printer, the default values are most likely wrong. Same thing for the stepper motors. If you replace stepper motors, make sure that your X, Y, and Z steps are correct. Using Marlin based firmware, you can set your X, Y, Z and E steps in the firmware before flashing or you can use the M92 command to update. Using Klipper firmware, you must set your rotation distance.
3d printing, inventing, experimenting, they all go together. One of the unfortunate side effects of experimentation is that I sometimes get myself in trouble. I checked a couple of boxes in Cura, just to see what they did. Then I forgot about it. This made for an interesting couple of days while I tried to figure out why all of my holes disappeared when I sliced my model. Upon further research, it turns out that this setting does have a good purpose. Sometimes, designers will introduce internal cavities into a model to suit a particular manufacturing process. These don’t work well when 3d printing, so rather than forcing designers to remove all of the internal cavities Cura just included this button for them.

On a complex piece of machinery like a 3d printer, there are many things that can go wrong. One thing that I see, from time to time, is that the machine won’t home. The first thing that I check when this happens is the cables. Every once in a while, a cable can get situated right between the Z sensor and the Z motor and prevent the Z axis from homing correctly.
I hear a lot of people that have difficulty with their prints curling off of the bed. This can be caused by a number of different things, which I will outline below:
- The most common problem is that the bed is not clean. The solution to this is also simple. Clean the bed. I use isopropyl alcohol with a lint free cloth before and after every print.
- Another common problem is that the nozzle is too near or too far from the bed and the filament doesn’t stick properly, then over time it pulls away from the bed. If this is the case, then you need to level the bed. It could also be that your bed itself is warped, in which case I usually recommend that people look into a mesh bed level.
- Temperature is another important aspect to making sure that your prints don’t warp. During the winter, I use an enclosure to ensure that the temperature around my printer is stable. For the first 2-3 layers, I also raise the bed temperature and the nozzle temperature by about 5 degrees and turn off any cooling.
- Speaking of cooling, too much cooling can also warp your print. Adjust your fan settings so that it doesn’t cool too fast and warp.
Something to consider. I see many people giving the advice of adding painter’s tape or glue onto their bed to make the filament stick better. This is only my personal opinion, but I believe that this masks any real issues that your machine may have. I believe that it’s far better to fully understand the mechanics of the root cause of the warping and address that, rather than just adding some glue and hoping for the best.